Noel 2016

You find the original of this tutorial here

Thank you very much Aquarellice for inviting me to translate your tutorials
I translated this tutorial using psp X8
Material here
You need also of Sqirlz Water Reflections here
Tube woman: Babette
Filters used: Unlimited 2 - Willy Distortion - Flaming Pear/Flexify - Bkg Designers sf10 IV - Sandflower Special - Nik Color Effex Pro

|
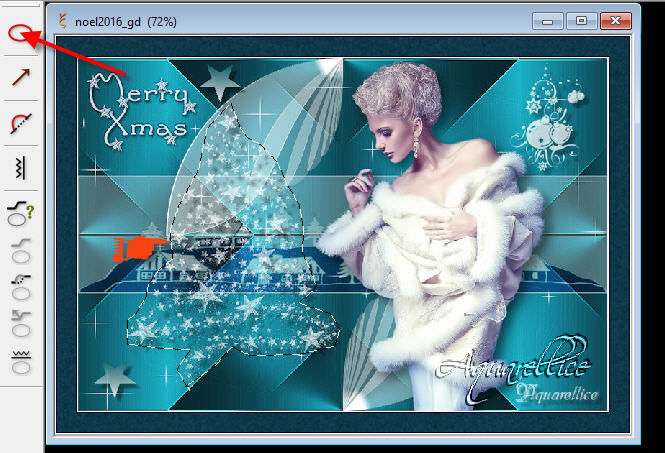
Bring the arrow to keep your place in your work
|
Preparation
Place "@qua28.PspBrush" and "BrushTip_@qua28.PspScript" in the folder Brushes
Place "@qua30.PspBrush" and "BrushTip_@qua30.PspScript" in the folder Brushes
Note: When working with your own colors, play with the Blend mode and/or Opacity at your own discretion
Color used

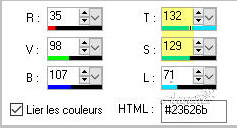
1. Materials palette: Set the Foreground color on #d0e4dd and the Background color on #083845.
2. Open "selections_noel2016".
3.Window/Duplicate (SHIFT+D) and close the original.
4. Work in the copy.
5. Rename this layer "Raster 1".
6. Set the foreground to gradient style linear:
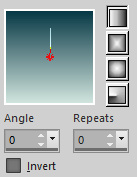
Flood fill the layer with the foreground gradient.
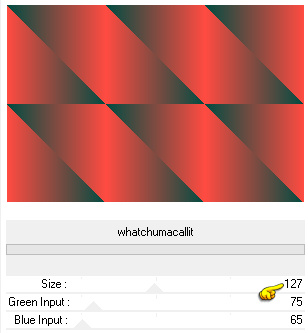
7. Effects/Plugins/Unlimited 2/Willy/Whatchumacallit:
8. For the background color you have:
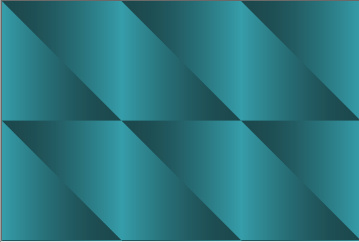
9. Adjust/Hue and Saturation/Colorize:

10. You should have this:
11. Effects/Plugins/Unlimited 2/& <Bkg Designers sf10 IV>/@EasyCorner UpperLeft.
You should have this:
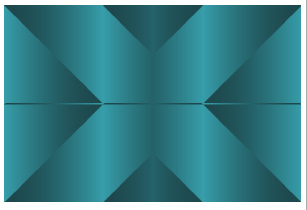
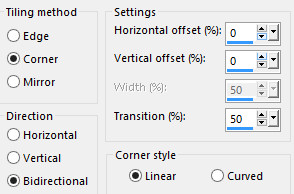
12. Effects/Image effects/Seamless Tiling:
13. Effects/Edge Effects/Enhance more.
14. Effects/Plugins/Unlimited 2/ &<Sandflower Specials°v<°>/Sparkle002 with default settings.
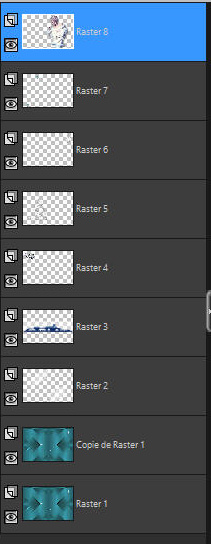
15. Layers/Duplicate.
16. Set the blend mode of this layer to overlay (or other).
17. Layers/New raster layer.
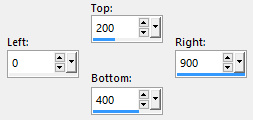
18. Selections/Load/Load selection from Alpha Channel and choose "Selection #1".
19. Materials palette: set the foreground color on #ffffff.
20. Flood fill the selection with the foreground color.
21. Selections/Modify/Contract: 2 px.
22. Hit the Delete Key of your keyboard.
23. Set the Opacity of the Flood fill toll to 40:
24. 
25. Flood fill the selection with the foreground color.
26. Selections/Select none.
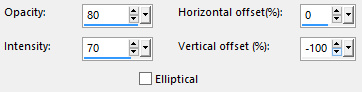
27. Effects/Reflection Effects/Feedback:
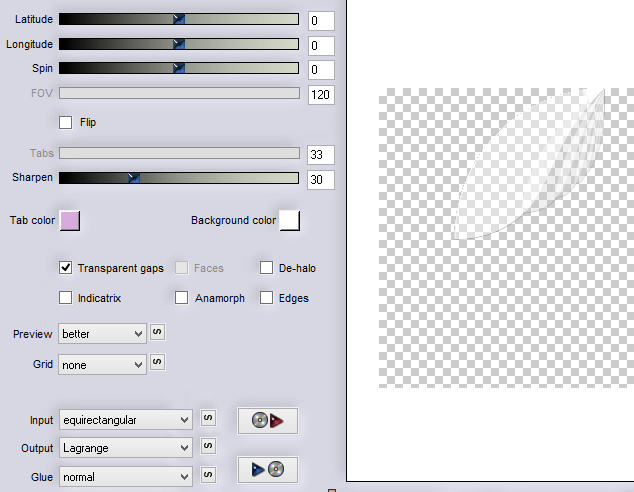
28. Effects/Plugins/Flaming Pear/Flexify 2.68:
29. Layers/Duplicate.
30. Image/Mirror/Mirror Horizontal.
31. Image/Mirror/Mirror Vertical.
32. Layers/Merge/Merge down.
33. Layers/New raster layer.
34. Activate the selection tool.
35. Choose the custom selection:
36. 
37. Set the Opacity of the Flood fill toll to 100.
Flood fill the selection with the foreground color.
38. Selections/Modify/Contract: 2 px.
39. Hit the Delete Key of your keyboard.
40. Set the Opacity of the Flood fill toll to 40.
41. Flood fill the selection with the foreground color.
42. Open the tube "calguisvillagehiver10122014". Edit/Copy and paste into selection.
43. Selections/Select none.
44. Set the blend mode of this layer to hard light and set the opacity to 50.
45. Open the tube "ASDwebs_TextMerryXmass". Edit/Copy and paste as new layer.
46. Place like as the final work.
47. Layers/New raster layer.
48. Activate the Paint Brush Tool and Choose "BrushTip_@qua30": set the opacity to 80 and the size to 500
49. 
50. Apply the brush as final work.
51. Effects/3D Effects/Drop Shadow: 14 / 10 / 50 / 5 / #000000.
52. Layers/New raster layer.
53. Activate the Paint Brush Tool and Choose "BrushTip_@qua28": set the opacity to 80 and the size to 200.
54. Apply the brush as final work.
55. Effects/3D Effects/Drop Shadow: 8 / 8 / 50 / 5 / #000000.
56. Open the tube "@qua_etoiles_noel2016". Edit/Copy and paste as new layer.
57. Place like as final work.
58. If necessary colorize like the point 9.
59. Effects/3D Effects/Drop Shadow: settings in memory.
60. Open the woman's tube "babette - 897 - 14". Edit/Copy and paste as new layer.
61. Image/Resize to 64% (all layers not checked).
62. Image/Mirror/Mirror Horizontal.
63. Place as final work.
64. Effects/3D Effects/Drop Shadow: 10 / 10 / 50 / 25 / #000000.
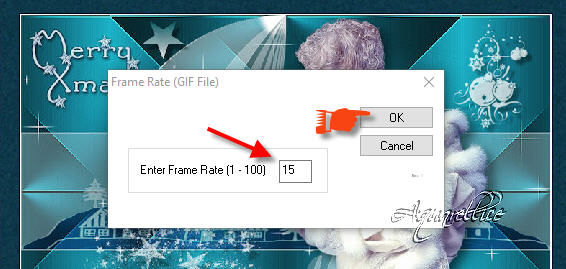
65. You should have this:
66. Image/Add borders symmetric of 2 px color #ffffff.
67. Image/Add borders symmetric of 35 px background color (#083845).
68. Select this border with the magic wand tool.
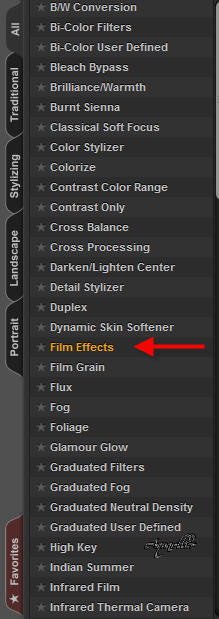
69. Effects/Plugins/Nik Color Eeffex Pro:
70. Selections/Select none.
71. Image/Add borders symmetric of 2 px color #ffffff.
72. Add your signature.
73. Layers/Merge/Merge down.
74. Image/Resize to 800 px of width (resize all layers).
Save as jpeg file.
75. If you wish the animation: open Sqirlz Water Reflection.
76. Clic on the green folder to search for your work you just saved:

77. Clic on the tool as below and select the three
Clic on the right mouse button to confirm your selection
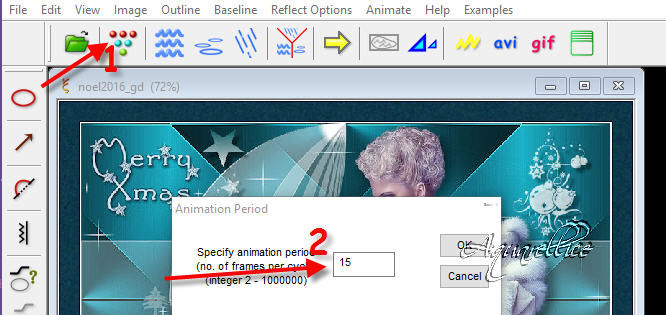
78. Clic on the small balls and put 15 instead of 20:
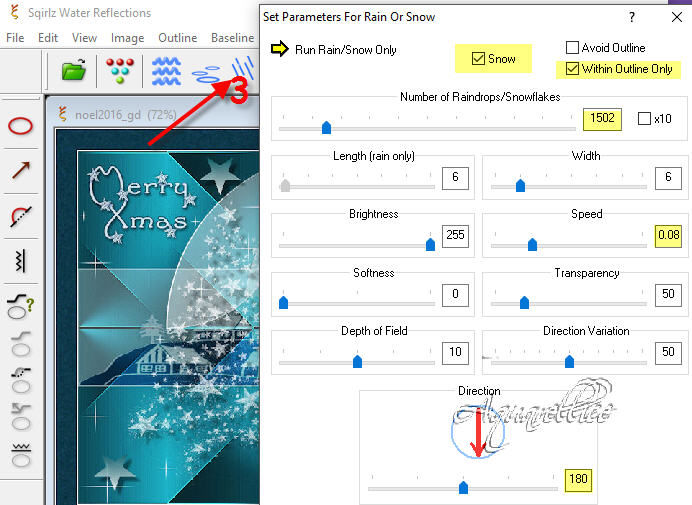
79. Clic on the tool rain and set the parameters:
Close the window.
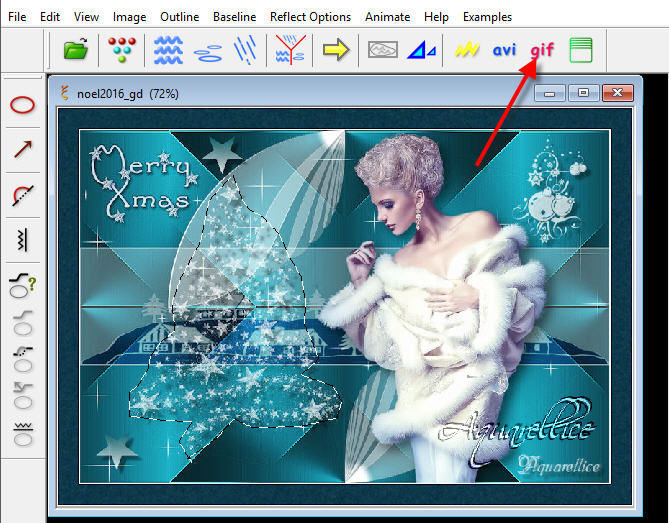
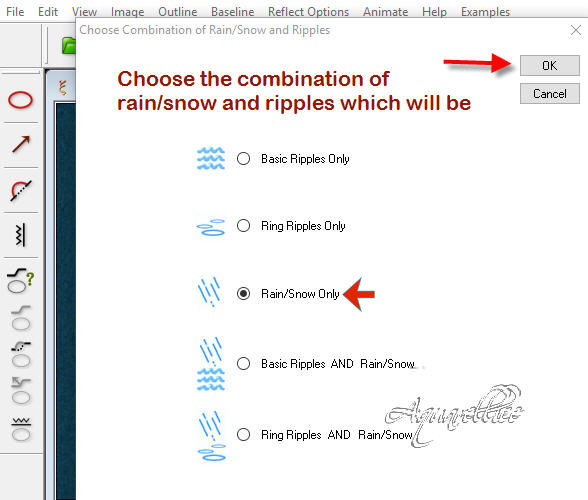
80. Clic on the yellow arrow to see the preview and choose the combination:

81. If you like the result clic on gif:
82. 
83. Set 15:
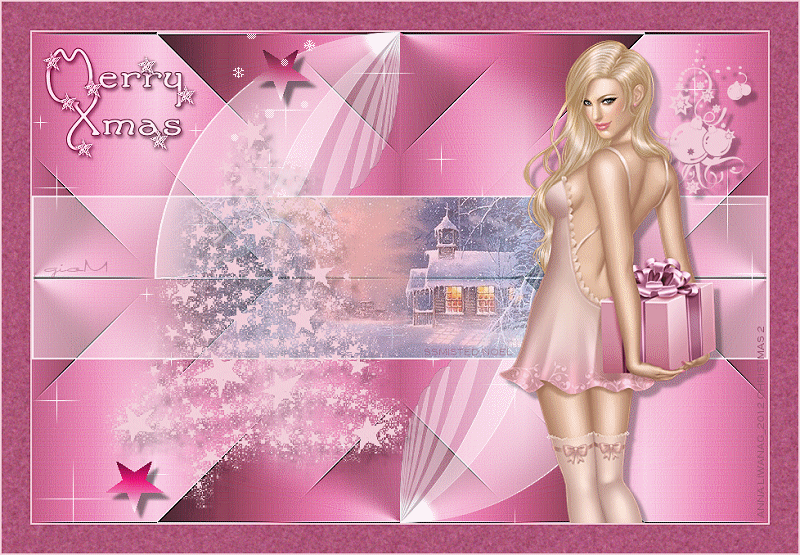
My version with the tube by Min@

Your wonderful versions- Thanks!
My tester gioM - I version
My tester gioM - II version

Manu

Tutorial translated by Byllina the 17 december 2016
Translations Aquarellice
Home
|