Preparation Open in psp "masque-mentali100": minimize to icon Materials palette: Set the Foreground color on #878c85 and the Background color on #89040b. Used colors:
Note: When working with your own colors, play with the Blend mode and/or Opacity at your own discretion
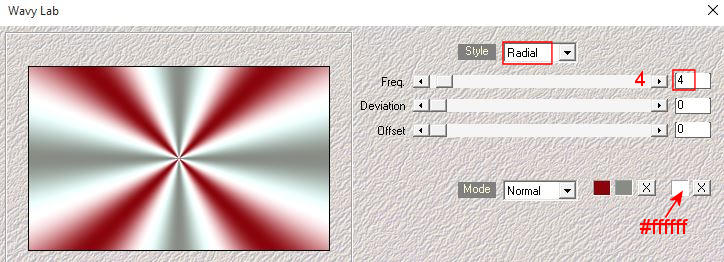
1. Open "Calque_Alpha Cassandra". Duplicate (SHIFT+D) and close the original. Work in the copy. 2. Effects/Plugins/Mehdi/Wavy Lab:
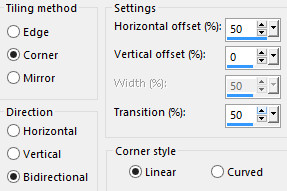
3. Adjust/Blur/Gaussian Blur: 25. 4. Layers/Duplicate. Image/Resize to 70% (all layers not checked). 5. Effects/Image Effects/Seamless Tiling:
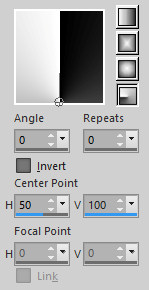
Set the blend mode to this layer to Multiply. 6. Image/Mirror/Mirror Horizontal. 7. Activate the layer Raster 1. Layers/Duplicate. 8. Effects/Plugins/Unlimited 2/Filter Factory Gallery M/Motion Trail with default settings. Change the opacity of this layer to 50. 9. Activate the layer Raster 1. Selections/Load/Load selection from Alpha Channel and choose "Selection #1". 10. Selections/Promote selection to Layer. 11. Effects/Plugins/Unlimited 2/& <Bkg Designers sf10 II>/Patchwork: 90. Selections/Select none. Layers/Arrange/Bring to Top. 12. Effects/3D Effects/Drop Shadow: 0 / 0 / 55 / 45 / #000000. 13. Activate the layer Copy of Raster 1 (the second from up) 14. Selections/Load/Load selection from Alpha Channel and choose "Selection #2". 15. Selections/Promote selection to Layer. 16. Adjust/Blur/Gaussian Blur: 50. 17. Effects/Plugins/Unlimited 2/Paper Textures/Canvas, Fine: 156 / 87. Adjust/Sharpness/Sharpen More. 18. Materials palette: Set the Foreground color on #000000 and the Background color on #ffffff. 19. Change the foreground to gradient style radial:
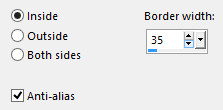
20. Layers/New Raster Layer. Selections/Modify/Select Selection Borders:
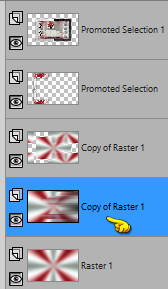
Flood fill the selection with the foreground gradient. 21. Effects/Plugins//Unlimited 2/Paper Textures/Papyrus: 66 / 96. 22. Effects/3D Effects/Drop Shadow: settings in memory. Selections/Select none. 23. Open the misted "Mist intérieur by Lily". Edit/Copy and paste as new layer. Image/Resize to 60% (all layers not checked). Adjust/Sharpness/Sharpen. Layers/Arrange/Move Down. 24. Layers/New Raster Layer. Selections/Load/Load selection from Alpha Channel and choose "Selection #3". Flood fill the selection with the foreground color. Selections/Select none. 25. Activate the layer Raster 2. Layers/Merge/Merge down three times. Layers/Arrange/Bring to Top. You should have this:
26. Activate Copy of Raster 1 (the second from down):
Selections/Load/Load selection from Alpha Channel and choose "Selection #4". 27. Selections/Promote selection to Layer. Effects/3D Effects/Drop Shadow: 10 / 20 / 55 / 45 / #000000. Selections/Select none. 28. Layers/New Raster Layer. Flood fill the layer with the background color. Layers/New mask layer/From image and choose "masque-mentali100": marquer uniquement source luminance. Layers/Merge/Merge group. Set the blend mode to this layer to Screen. 29. Activate the top layer (Promoted Selection 1). Layers/New Raster Layer. Materials palette: Set the Foreground color on #000000 and the Background color on #89040b. Change the foreground to gradient style sunburst:
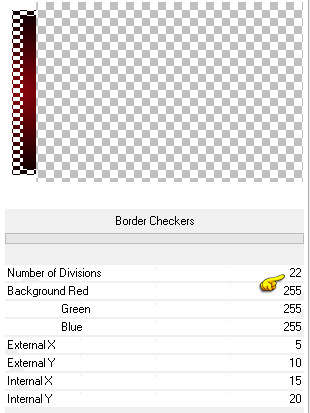
30. Selections/Load/Load selection from Alpha Channel and choose "Selection #5". Flood fill the selection with the foreground gradient. Selections/Select none. 31. Effects/Plugins/Unlimited 2/Alf's Border FX/Border Checkers:
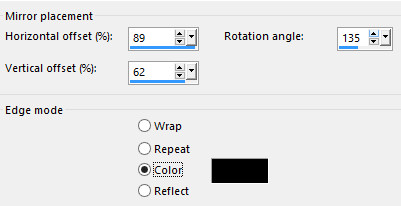
32. Select the white border with the magic wand tool (tolerance 0 - feather 0). 33. Effects/Reflection Effects/Rotating Mirror (color #000000):
Selections/Select none. Change the opacity of this layer to 50. 34. Open "Déco 1 Cassandra". Edit/Copy and paste as new layer. Place to right. Layers/Arrange/Move down twice. 35. Effects/3D Effects/Drop Shadow: 10 / -20 / 45 / 5 / #000000. 36. Activate the top layer (Raster 2). Open "Déco 2 Cassandra". Edit/Copy and paste as new layer. Do not move. You should have this:
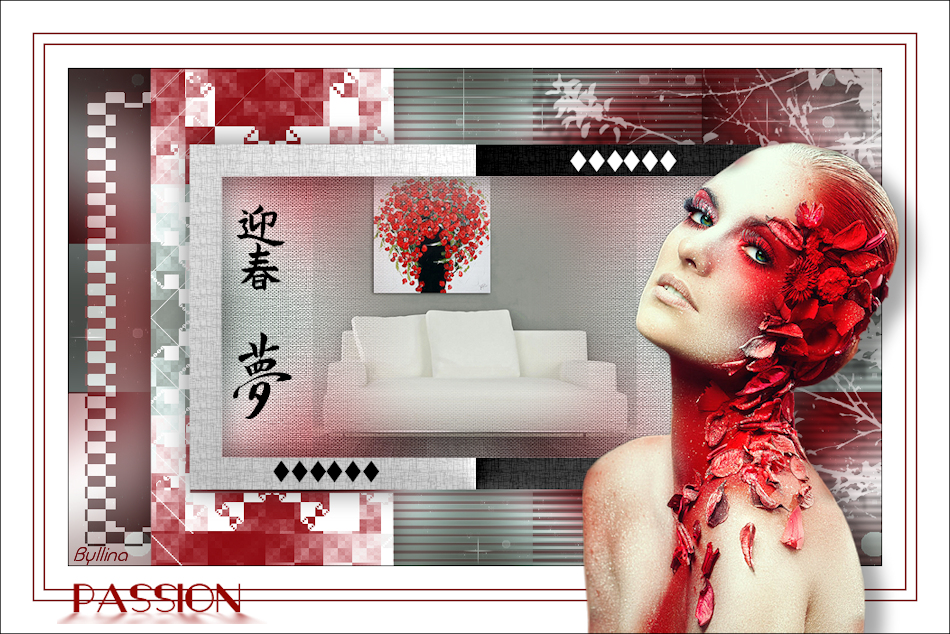
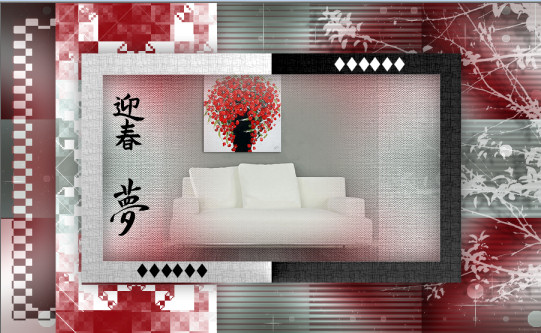
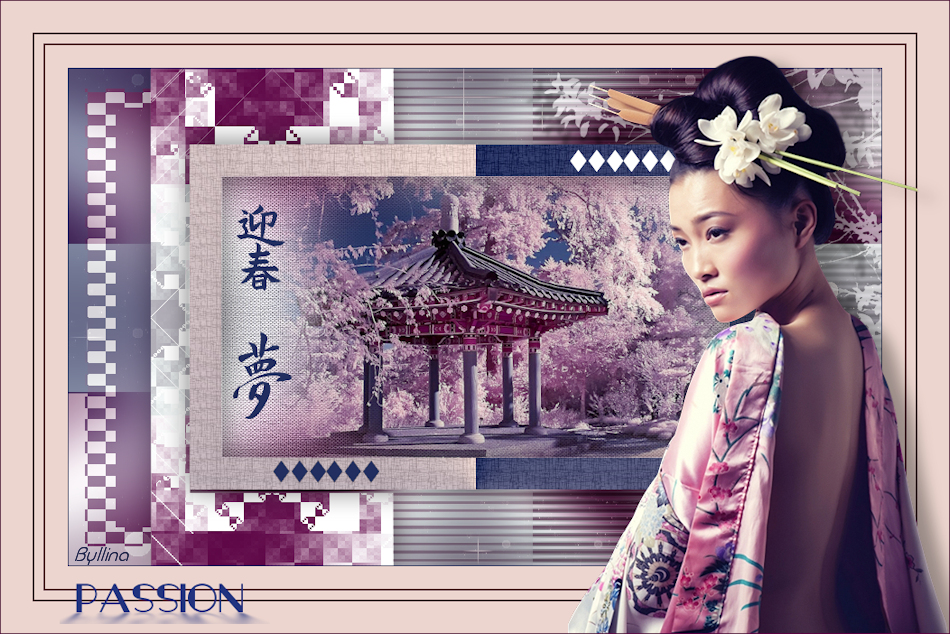
Layers/Merge/Merge all (Flatten). 37. Image/Add borders symmetric of 1 px color #000000. 38. Image/Add borders symmetric of 25 px color #ffffff. 39. Image/Add borders symmetric of 2 px color #89040b. 40. Image/Add borders symmetric of 10 px color #ffffff. 41. Image/Add borders symmetric of 2 px color #89040b. 42. Image/Add borders symmetric of 35 px color #ffffff. 43. Open the tube's woman "Femme 90 by Lily". Edit/Copy and paste as new layer. Image/Resize to 70% (all layers not checked). Place to right. Adjust/Sharpness/Sharpen. 44. Effects/3D Effects/Drop Shadow: 10 / 20 / 35 / 25 / #000000. 45. Open "Text by LF". Edit/Copy and paste as new layer. Place down to left. Image/Add borders symmetric of 1 px color #000000. Add your signature. Layers/Merge/Merge all (Flatten). Image/Resize to 950 px of width. Save as jpeg file. My version with the tube by Kts and misted by Min@
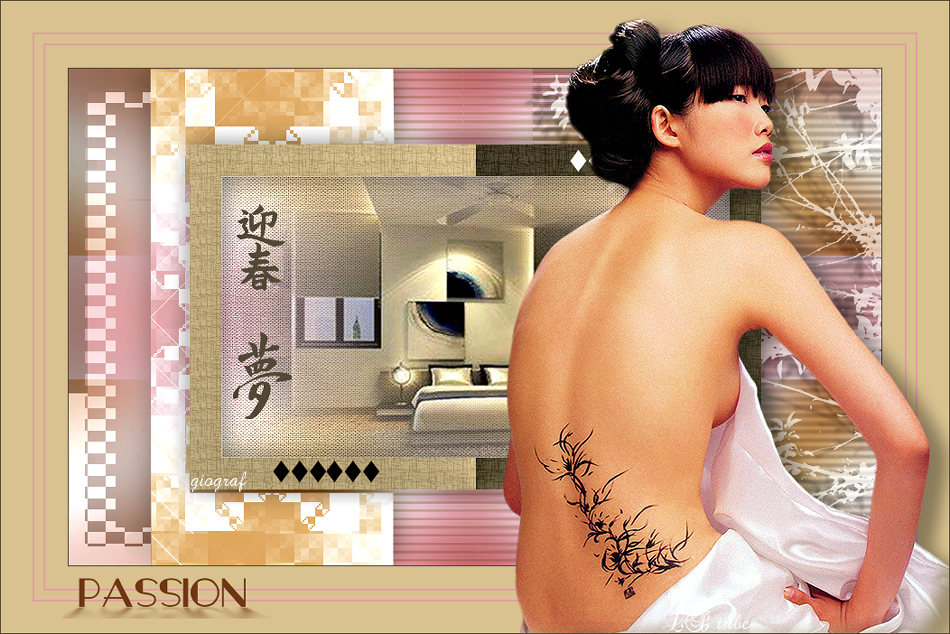
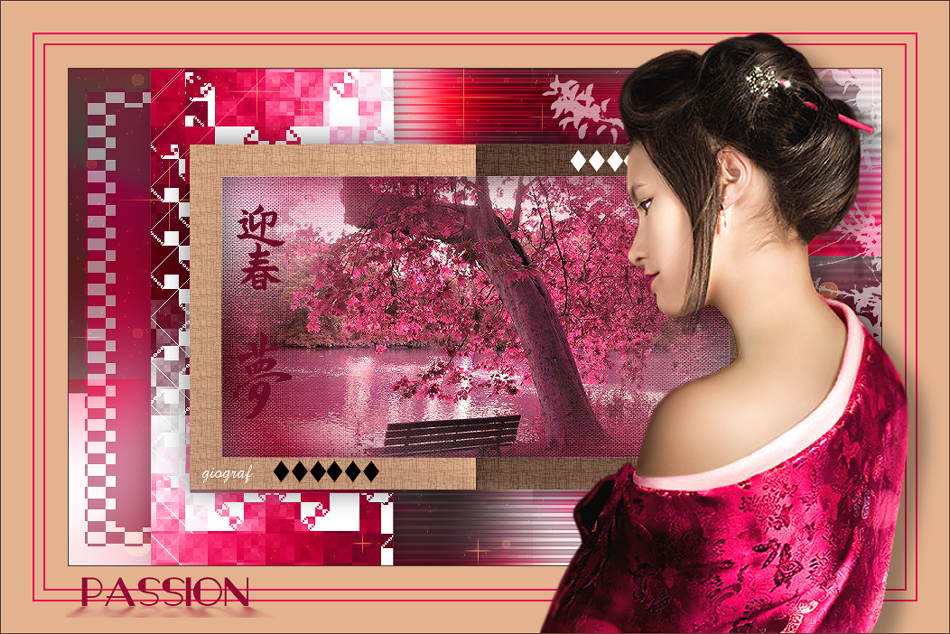
Th two versions of my tester Giograf - Thanks
Tutorial translated by Byllina the 11 november 2015 |